Pages

Total Pageviews

Saturday, January 19, 2013

What's Your One Little Word for 2013?

Sometimes I can't stand the little twee things that become popular on the internets - but this "one little word" business I can handle. Last year it was "dignity". (I did my best with that word. Honestly I did.)
This year, in honour of my New Year's first activity  my word will be "volunteer". I'm hoping I'll do that word more justice than I did "dignity".
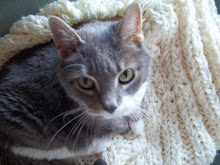
After a thrilling NYE falling asleep while watching Liz & Dick, (review: LiLo isn't as pretty as Elizabeth Taylor. Actor who played Dick had much better skin than the real thing.) I woke up bright and early New Year's Day.  Milo and I put on our uniforms and headed over to Woodingford Lodge for some visiting.
I volunteer one day a week. When you think about it, it's not that much time. I clock two hours with my grooming time and travel time. That puts me in the 100+ hours a year category: the volunteer elite.
(I'll pause now for the pats on the back and the "attagirl".)
It doesn't seem like that much work - KWIM? And I'm in the volunteer elite? Let me just repeat the old truism: if I can do it, anyone can!
I've done the traditional "pink lady" volunteering, starting with Tampa General Hospital in the mid-80's.The training was comprehensive and well-organized. I''ve used their standards of volunteer training as a bench mark in my volunteer life. I worked three hours a week in the ER. I was appreciated and treated well by all of the staff - and I got invited to some great after-hours parties. It was a great place for a single girl to do some community work - the men (attractive, well-educated) outnumbered the women. All you did was pick the age, the weight and size.
I volunteered later on as a "cuddler" in the NICU step-down unit at Shands Hospital. The training was sub-par and I had to fight sleep while cuddling the little nippers, but my volunteer experience fast-tracked me to a sweet part-time job in the hospital.
I'm happy to say that my training with the therapy dogs of SJA was just about as thorough as my TGH volunteer training. Support and training I think are the back-bone of a good volunteer experience.
You don't necessarily have to participate in an organized volunteer activity. I've thought about more volunteer activities for myself so I'll pass them off on as suggestions.
This is part of my stash. Modest in comparison to some, but enough to give Roger a facial tic.
For example - I was going to post about my latest knitting-related project: stash-busting.

Sunday, January 6, 2013

My Favorite Cowl Pattern


This is what most of my family/friends received this past Christmas. I've made about ten of them and everyone loves them. They're fun and quick to knit - it only takes one skein although the original instructions from Bernat say to use two - I haven't used more than one skein on any I've made.
The shaker rib takes a *teeny* bit of getting used to. I usually have to frog several times before I get my groove going - but since you only cast on two stitches at the beginning - who cares?
MATERIALS
Bernat® Mosaic
(100 g/3.5 oz; 191 m/209 yds)
44315 (Ninja) 2 balls

Size 5.5 mm (U.S. 9) knitting needles or size needed to obtain gauge.

GAUGE
14 sts and 30 rows = 4 ins [10 cm] in Shaker Rib Pat.

INSTRUCTIONS
Cast on 2 sts.
1st row: (RS). Inc 1 st in first st. K1.
2nd row: K3.
3rd row: Inc 1 st in first st. Inc 1 st in next st. K1.
4th row: K2. K1B. K2.
5th row: Inc 1 st in first st. Knit to last 2 sts. Inc 1 st in next st. K1.
6th row: K2. P1. K1B. P1. K2.
7th row: As 5th row.
8th row: K2. *K1B. P1. Rep from * to last 3 sts. K1B. K2.
9th row: As 5th row.
10th row: K2. P1. *K1B. P1. Rep from * to last 2 sts. K2.
Rep 7th to 10th rows until work measured along straight edge measures approx 12½ ins [32 cm] ending on 10th row.
1st row: (RS). Inc 1 st in first st. Knit to last 3 sts. P2tog. K1.
2nd row: K2. *K1B. P1. Rep from * to last 3 sts. K1B. K2.
3rd row: As 1st row.
4th row: K2. P1. *K1B. P1. Rep from * to last 2 sts. K2.
Rep last 4 rows until longest straight edge measured from corner cast on measures approx 28 ins [71 cm] ending on a 4th row.
1st row: (RS). K1. K2tog. Knit to last 3 sts. P2tog. K1.
2nd row: K2. *K1B. P1. Rep from * to last 3 sts. K1B. P1. K1.
3rd row: As 1st row.
4th row: K2. P1. *K1B. P1. Rep from * to last 2 sts. P1. K1.
Rep last 4 rows until 7 sts rem, ending on 4th row.
Next row: K1. K2tog. K1. P2tog. K1.
Next row: K2. K1B. P1. K1.
Next row: K1. Sl1. K2tog. psso. K1.
Next row: Sl1. K2tog. psso. Fasten off.
Sew center back seam.
Note : to make the edges of this item much more tidy, do the following:
at the beginning of every row, knit the first stitch through the back. At the end of every row, slip the last stitch purl-wise.
I'm not being sponsored - although you guys can chime in at any time! but please consider signing up at Bernat. They have tons of great patterns and lots of info.
Thanks for reading - and happy knitting!

Friday, December 28, 2012

A LIttle Post-Christmas blurb

We went from no snow to "living in a snow globe" within a couple of hours on Wednesday. It was the kind of snow that makes you SOOOOOOOO happy that you're indoors!
We welcomed little Cohen into our family last week. He arrived safely on Tuesday the 18th. He's a whopper - weighed in at 9.4 pounds. There was a definite urgency in getting him photographed in his "Size newborn" duds. Proud parents are my stepson, Kyle, and his SO, Janelle.
I thought I'd include a little tutorial on converting those wine-bottle gift bags into regular sized ones - or small enough for some little trinkets. If you're a friend of mine, I know for sure you get a LOT of these bags from somewhere or other. I know it's too late for this year - but this could be a lifesaver for you next year!

Use bags that have a repeating pattern.

Cut about 3 ins from the top, then about six or seven inches from the bottom. Discard center section.
Use decorative scissors to trim top section.
Fit top section over bottom section.
Stapling is fine for joining the two pieces.
You can add detail such as a little fringe.
Voila! I hope this can spare you a few last-minute trips to the Dollar Store next year!

Sunday, December 9, 2012

I Love Florida

.......and FYI - the best time to visit is in fall, in my humble opinion! You have lovely temperatures, little if any humidity, and the traditional fall drought that may aggravate the gardeners is wonderful for us tourists!

The Heritage Center in Tarpon Springs, Florida
I arrived shortly before Thanksgiving and my sister, Noel, had planned an outing for us to Tarpon Springs - a lovely little Greek community in an unspoiled Old Florida town, whose waterfront is still working and busy. We were going to a cooking class at the Heritage Center in Tarpon Springs!
Beautiful Yiota, our teacher
Yiota was assisted by her granddaughter, also a talented cook!
My sister Noel was an audience participant.
ReYiota, our teacher, had planned a Cypriot dish for us to make: kleftikos. The recipe is simple: a 4 oz or so piece of lamb shoulder, a quarter potato, a bay leaf, lots of salt & pepper. Wrap up in parchment & heavy-duty aluminum foil for two hours at 350. Yiota said that kleftikos are great for a party. The recipe's name means "stolen", as Cypriots used to steal lambs from their many invaders over the years. To conceal the lamb while cooking it, the Cypriots dug a hole, built a fire, and cooked the meat underground to prevent smoke coming from the fire - avoiding eventual discovery! My visits to Tampa are always low-key. I do plenty of relaxing under the oak trees in Noel`s front yard.Her house is on a narrow, tree-lined fairway on a local golf course. For the unluckier of the golfers, it`s pretty much of a `hell-hole`but a pretty entertaining spectacle for us. My mom could pay for her National Enquirers with the amount of good golf balls that land in the yard.

We love grilling in the yard.


The evening`s fare was pompano. (Recipe: put it on hot coals and cook `til done.)
I met up with my good friends and absorbed some of their boundless energy. We hit the waterfront in St. Pete and wandered around in the sunshine after  lunch at Cassis.
Brenda snaps pics with the expertise of an experienced traveler.


I'm off to do some holiday-related tasks but wanted to introduce my new kitty, Honey to you all. Thanks for your continued loyalty and for the visits even when I hadn't posted in a while!


If you're interested, I adopted Honey from St. Thomas Animal Aid in St. Thomas, Ontario. If you have the luxury of ever deciding when you're getting a  cat, as well as which one, then this place is for you. It's a veritable cat wonderland. The staff  does a great job of match-making cat to adoptive family.
Lovely Honey, my new kitty.
We'll soon see if Honey is a "hat cat" like Lillie!

Wednesday, October 31, 2012

Stefano Faita's Mom's Minestrone

In anticipation of being hunkered down from Hurricane Sandy (when was the last time a hurricane affected SW Ontario? Hm? Anyone?) I made a huge pot of this soup. It's on Stefano's show. Just tune in any time.
What? You don't get Stefano where you live?
Pity.
Anyway, here it is, copied and pasted from Stefano's website.

Hearty and filling, Stefano's secret family recipe for minestrone soup is sure to be a hit with the kids and the leftovers make a delicious packed lunch too.
Pack this hearty vegetable soup for lunch and you'll have enough energy to plow through any busy work day!

INGREDIENTS
3 (14 ounce) cans white beans
1/2 cup extra virgin olive oil
8 ounces pancetta or bacon, diced
2 garlic cloves, minced
1 onion, chopped
2 stalks celery, diced
1 carrot, diced
1 sprig rosemary, chopped
1 (14 ounce) can diced tomatoes
1/2 head kale, chopped
1/2 white cabbage, chopped
3 leeks, sliced
3 zucchini, diced
Salt and freshly ground pepper, to taste
Piece of Parmesan cheese rind (optional)
7 to 8 cups chicken stock
Handful basil, chopped
Handful Italian parsley, chopped
Freshly grated Parmesan cheese, for serving
Crusty bread, for serving

PREPARATION
Mash half the beans and leave the remaining half whole. Set aside.
Heat the olive oil in a large pot and sauté pancetta, garlic, onion, celery, carrot and rosemary for 5 to 7 minutes.
Add tomatoes, kale, cabbage, leeks, zucchini, and beans (whole and mashed), bring to a simmer, and cook for 15 minutes.
Season the soup with salt and pepper. For extra flavour, add piece of Parmesan rind, if desired. Add 7 cups chicken stock and bring to a boil. (If you prefer a thinner soup, add 1 cup more chicken stock.) Reduce heat and let soup simmer, uncovered, until the minestrone has a dense, stew-like texture, about 45 minutes to 1 hour. According to my mom, you know when this soup is done when a spoon can stand in the centre of the soup.
Finish the soup with basil and parsley. Serve with freshly grated Parmesan cheese and crusty bread.


Yield: 6 to 8 servings.
You need to start this soup in a large potaje (Tampa girls - please translate) because the vegetables are so bulky at first. I shredded the cabbage first in my food processor.
Chard works when you can't find kale. You might even prefer it over kale's sharpness.
This soup freezes beautifully!
I hope you enjoy this.

Milo wore his costume yesterady when we did our regular visit at Woodingford.

Saturday, October 27, 2012

Lemon Layer Cake

The picture isn't quite "blog ready" but what the hell - here goes. It's a delicious cake and you'll want to make one for your family.

I got the original recipe from the latest edition of my my favorite cookbook, Betty Crocker! It's a basic yellow cake recipe that can be adapted in just about any way you can think of.
I don't have a nice stand mixer so I use my food processor with the plastic blade attached. (It comes out just fine if you've ever wondered.) I also use my food processor, with the same plastic blade, to make my cookie dough.

2 cups flour
1 1/2 cups sugar
3 large eggs
1 1/4 cup milk
1 tsp salt
3 1/2 tsp baking powder
2/3 cup shortening (I like to use .....LARD!!)
2 tbs lemon zest
1 tsp lemon extract

Preheat oven to 350. Blend together dry ingredients, set aside. Prepare 2  8-in. cake pans by greasing them and flouring them lightly. Cream shortening and sugar together until fluffy. Add extract, then add eggs one at a time and mix enough to completely blend. Begin adding dry ingredients alternately with milk. Mix in lemon zest until blended. Process for about one minute on high.
Fill cake pans and bake on the middle shelf for 20 - 25 minutes or until a cake tester comes out clean. Remove at first sign of done-ness. Let cool completely before removing layers from pans.

 Here's the delicious and tangy lemon frosting:

1/2 cup butter
8 oz cream cheese
1/4 c lemon juice
zest of one lemon
4-5 cups icing sugar (powdered sugar for you stateside)

Begin by blending cream cheese and butter together until smooth. Add lemon juice and lemon zest and blend, then start adding the powdered sugar until your frosting is stiff enough to hold a peak. Frost cake when it is completely cool.
Enjoy!
Hope this brightens up your weekend - especially with the storm threatening!

Thursday, October 18, 2012

Finish Before You Start!

Last night I  had a revelation while I was seaming a sweater I had knitted last spring: I had not been thinking at all about how the sweater would be finished! I came to this conclusion while trying to disguise the knots and bunches as I joined the pieces. Happily, it's just a "cottage" sweater - one I whipped up (thanks to SweaterWizard) out of  two strands of Bernat Alpaca Natural Blends  in a a gorgeous pale crystal-blue shade. It's  fairly reasonably priced but knits up like a more high-end yarn. Unfortunately, it's not given much love on Ravelry. There are many complaints about the shedding of the yarn. I haven't had any problem with it - not that I've noticed.

 
Anyway - back to my original topic of thinking about the finished item before you even cast-on. Somewhere between the knitting of the above sweater and my more recent items, I learned the power of a good selvage stitch. I knit the first stitch in the row through the back of the stitch, then slip the last stitch purl-wise. It gives a lovely edge that I've learned is a cinch to seam and looks particularly nice when done.
This is also important - regardless of what the directions say, when increasing or decreasing, do it in the second, or in the next-to-the-last stitch in the row, respectively. I failed to do that with the above sweater and I am dealing with damage-control now!
Of course, the most essential arsenal in your finishing locker is swatching. Swatch not only for your gauge but also to test stitches and edges. If you've become accustomed to more high-end yarns, this will become your mantra, believe me. No one wants to bugger up a ball of cashmere for lack of planning. On a side note to swatching, if you've got a special project on deck, it's fun and gratifying to get right in there with the yarn and let it wind through your fingers as you drink wine and mindlessly knit up a swatch in front of a cozy fire, dog in lap. (*Insert mental image here*)