In this entry, I'm going to tell you
 |
| how this |
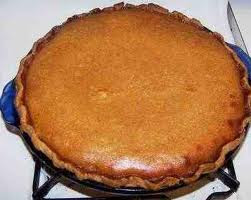 |
| gets to be this |
Forget the canned pumpkin. I'm going to encourgage you - just this once - to try making one from the actual
pumpkin.
First of all, you need a pie pumpkin. They're the perfect, smaller ones that you'll see in the produce department and roadside stands.
(
Note: I'm going to skip with all of the step-by-step photos a lot of other bloggers use. As I said before, my readers know their way around a kitchen, thank you very much! We don't need anyone showing us a photo of an egg like it's the first itme we've ever laid eyes on one.)
It's easy.
1. Cut the top off of the pumpkin, then cut it in quarters.
2. Get rid of the seeds and stringy pulp by scraping the inside with a big spoon or whatever...
3. Place the quarters flesh-side down on a foil-lined baking sheet. Bake at 350 for about 45 minutes, or until a fork easily pierces the flesh.
4. When the pieces are cool enough to handle, scoop out the pulp.
5. In your food processor or blender, puree the pulp until very smooth in consistency.
6. Line a strainer of colander with cheescloth. (I didn't have any so I used coffee filters.)
7. Put the puree in the colander or strainer and let it drain for at least eight hours.
You'll need a scant two cups of puree for a pie. That's equal to a can of packed pumpkin, and just right for a pie.
Here's the recipe I used, from the newest edtion of the
Betty Crocker Cookbook.
Pastry for a 9 in, one-crust pie
2 large eggs
1/2 c sugar
1 tsp cinnamon
1/2 tsp salt
1/2 tsp ground ginger
1/8 tsp ground cloves
1 can (or two cups) pumpkin
12 oz evaporated milk (almost an entire can)
Heat oven to 425.
Mix ingredients and pour into pie shell. Bake for 15 mins, then turn oven down to 350 and continue to bake for about 45 mins or until a knife inserted in the center of the pie comes out clean. Allow to cool for four hours. (
YEAH - RIGHT!)
What you'll get is the lightest, most fresh-tasting pumpkin pie you've even had! It is easy, isn't it? I'll expect your comments to be filled with praise for this pie.